
A spout pouch drop test that ends in "three of five failed" is not a result. It is a sentence that cannot be reproduced, cannot be assigned to anyone, and cannot be argued with when a buyer asks what you changed after it. The number survives the meeting; the information that would have prevented the next failure does not.
What this article gives you is the recording layer of the test: a six-zone map of a filled stand-up pouch, the fields a usable record needs, and a blank sheet you can copy today. It deliberately does not tell you what drop height to use or what counts as a pass — those are your specification's job and your buyer's, and inventing them here would make the article useless to anyone with an actual acceptance criterion.
One scope note before the map. This is about the finished pack under transport challenge: the filled pouch, its fitment, its closure and the carton it travels in. It is not a strength guarantee for a cap or a spout measured on its own, and a good result on a bare component does not transfer to a filled bag. If you are still choosing the closure system this test will eventually judge, the pillar guide to Choosing & Running Spout Caps is the right starting point; this article assumes that choice is made.
A Failed Drop Only Tells You Where It Failed
Most drop test reports record an outcome. The useful ones record an event.
The difference matters because a filled pouch fails in places that look nothing alike and get fixed by different people. A split at the bottom gusset corner after a corner-first landing is a pack-out and seal-width story. A wet flange weld after a flat-panel landing is a welding-window story. Same verdict, opposite action. If the record stops at "failed", you have thrown away the only part that discriminates between them: the drop test failure location.
So the record has to answer three questions about every failure, and answer them in a form someone else can re-run:
- Which drop was it? Not "the drop test" — the third of five, from the flat side, landing on the seal edge.
- Where on the pouch did it open? A named zone, not "near the bottom".
- How bad was it, and when did you see it? A seep at the moment of impact and a seep that appears forty minutes later are different failures.
Everything below is machinery for those three answers. It is also, in practice, the part of a test program that gets skipped when a launch date slips — which is exactly why the same failure shows up again six months later with no history attached.
Six Zones Where a Filled Spouted Pouch Fails
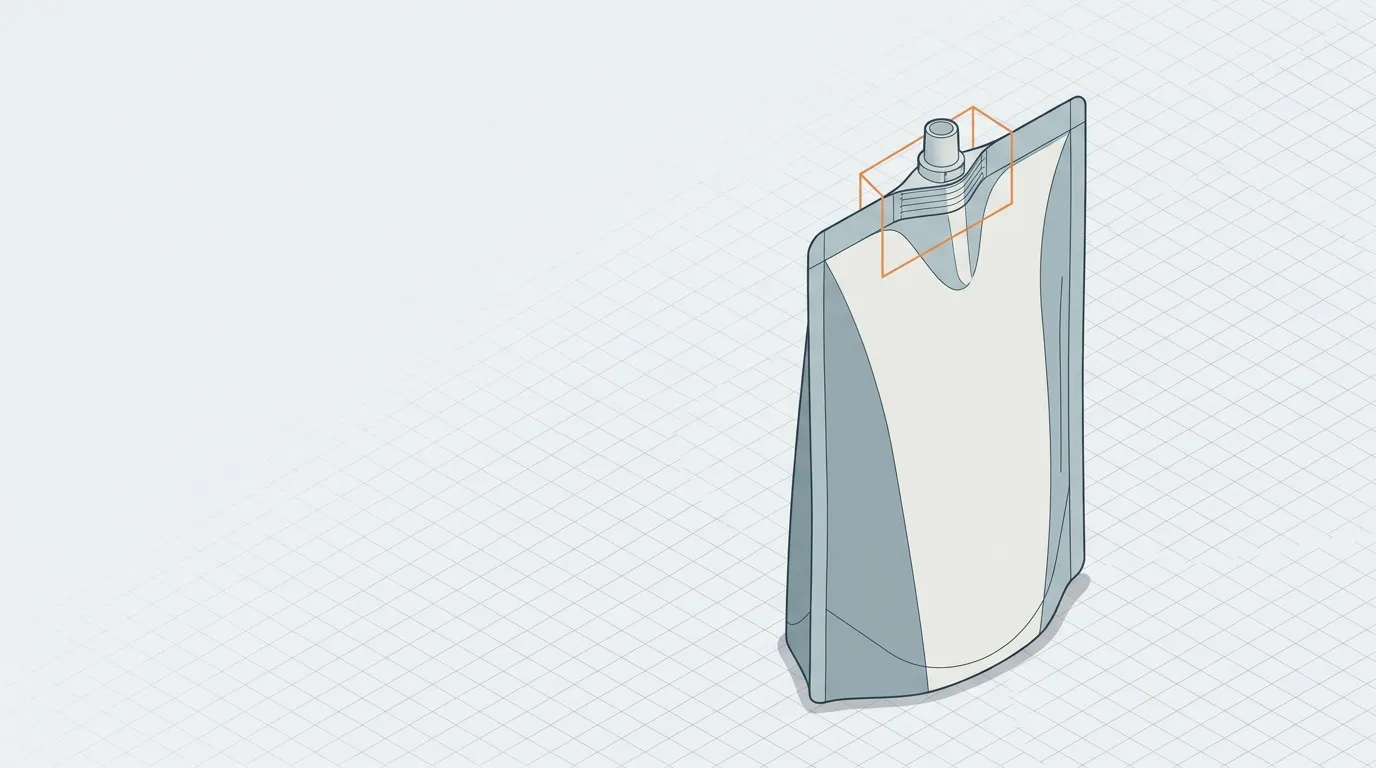
A spouted pouch is not a uniform bag. It is a film body with a rigid fitment welded into it, and the failures cluster at the places where material, thickness or geometry changes. Six zones cover what a transport drop actually produces.
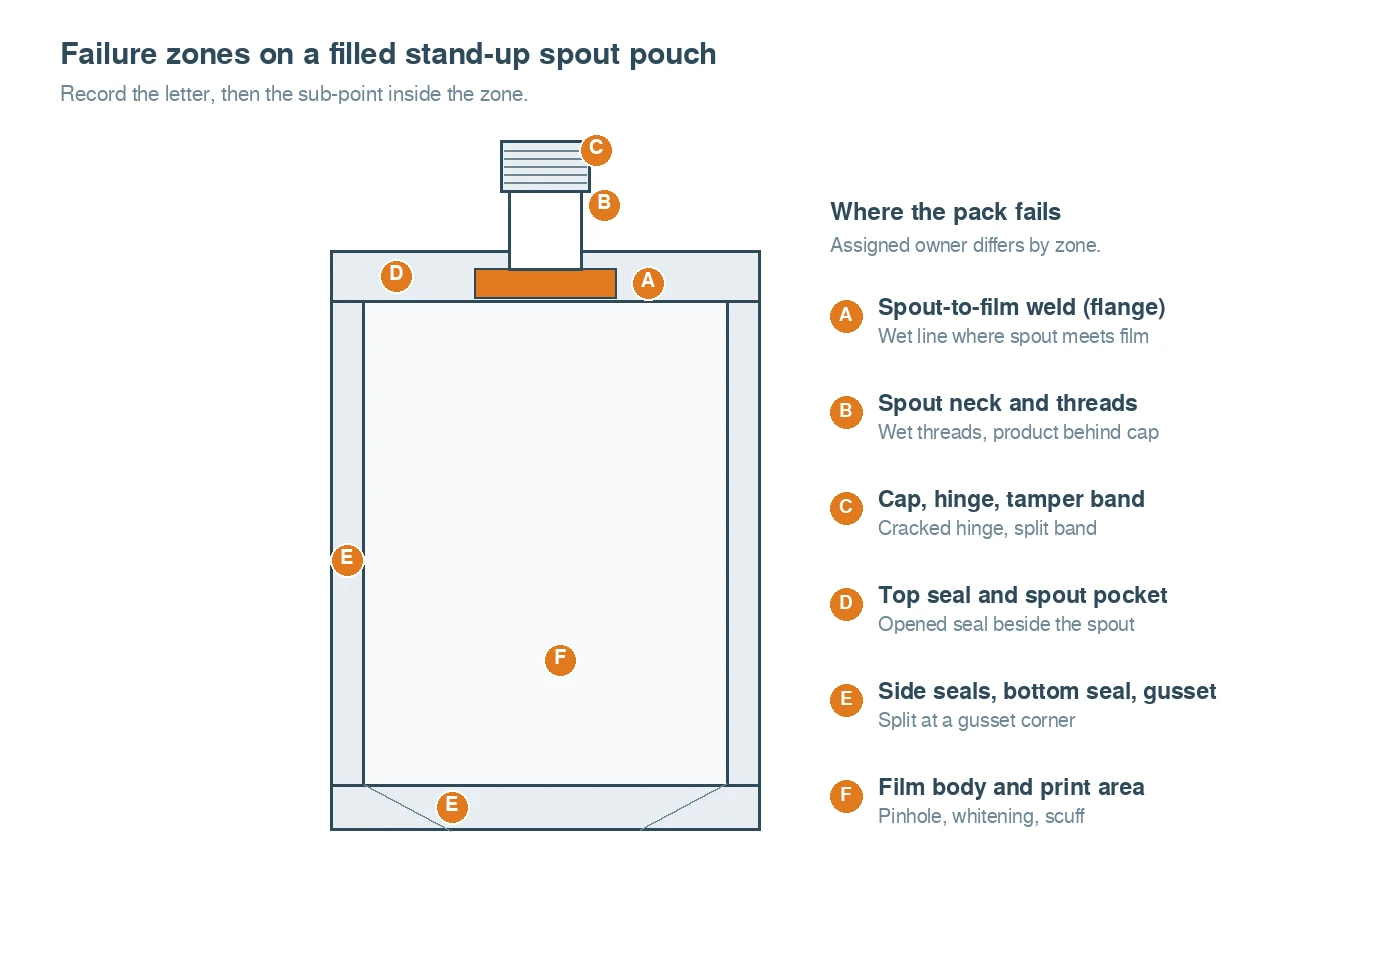
Zone | First thing you see | Usually traces back to | Who owns the fix |
|---|---|---|---|
A Spout-to-film weld (flange) | Product tracking along the flange edge; a thin wet line where spout meets film | Load transferred through the spout, or a weld run outside its window | Converter and fitment supplier together |
B Spout neck and threads | Wet threads; product behind the cap skirt | Spout geometry, or cap-to-spout fit | Fitment supplier |
C Cap, hinge and tamper band | Cracked hinge, split band, cap rocking on the neck — the three shapes of spout cap damage after impact | Direct cap-end impact, or torque applied at capping | Closure supplier and filler |
D Top seal and spout pocket | Opened seal beside the spout; a fishmouth | The narrowest seal in the pack taking hydraulic shock | Converter |
E Side seals, bottom seal, gusset corners | Split at a gusset corner; seal creep along an edge | Corner-first landing, or seal width under load | Converter |
F Film body and print area | Pinhole, whitening, flex-crack, scuff | Puncture or abrasion inside the carton | Converter and pack-out design |
Two things follow from this table, and they are the reason to draw the zones at all.
The transitions fail first. Zones A and D sit where a rigid part meets a flexible one, or where a seal ends and free film begins. Impact energy concentrates there rather than spreading across the panel. A test that only inspects the front panel will report a clean run and miss the two zones most likely to have started a slow leak.
The zone tells you whose problem it is. Recording "leak at the spout" without a zone sends the complaint to the fitment supplier by default, and often the answer is at the top seal next to it. A zone E failure landing on a converter's desk rather than a closure supplier's is not a bureaucratic detail — it is the difference between a fix this quarter and a fix next quarter.
Record the Drop Before You Describe the Damage
Sequence is the field people drop first and miss most.
A pouch that lands on a bottom corner and then leaks at the flange has told you something about impact path. A pouch that lands flat and leaks at the same flange has told you something about the weld. If your sheet only has one row per sample, those two outcomes merge into "failed at flange" and the discrimination is gone. One row per drop, even when nothing happens.
The orientation vocabulary only needs six entries, and it should be written on the sheet rather than left to the tester's memory:
- Flat front or back panel
- Flat side, or the gusset face
- Bottom seal, or bottom corner
- Top seal, with the spout pocket
- Cap or fitment end
- Edge or corner
Not every project needs all six. Pick the orientations your distribution actually produces, write down which ones you picked, and keep them identical between runs — a comparison between two tests that used different orientation sets is not a comparison.
There is one orientation worth a warning. Doypack makers who run drop tests in-house point out that dropping a pouch upside down, straight onto the spout, will separate the fitment from the film on a well-made pack as readily as on a bad one, because the whole impact load arrives on the smallest rigid part (vp-packaging's drop test notes describe this as a test that destroys the package regardless of quality). If your route never presents a pouch spout-first to the floor, scoring that orientation will generate failures that say nothing about your pack. Record it if you run it; do not treat it as a verdict.
Record the height you actually used, measured or confirmed, every run. Not because there is a correct number — there is not, and this article will not invent one — but because the number is a variable in your own comparison. A retest at a height nobody wrote down is a new test, not a repeat.
Seven Fields That Make a Spout Pouch Drop Test Record Usable
Here is the sheet. The pouch drop test record sheet is seven fields per drop, one free-text line, and nothing else, because a form long enough to discourage filling in is worse than a short one that always gets filled in.
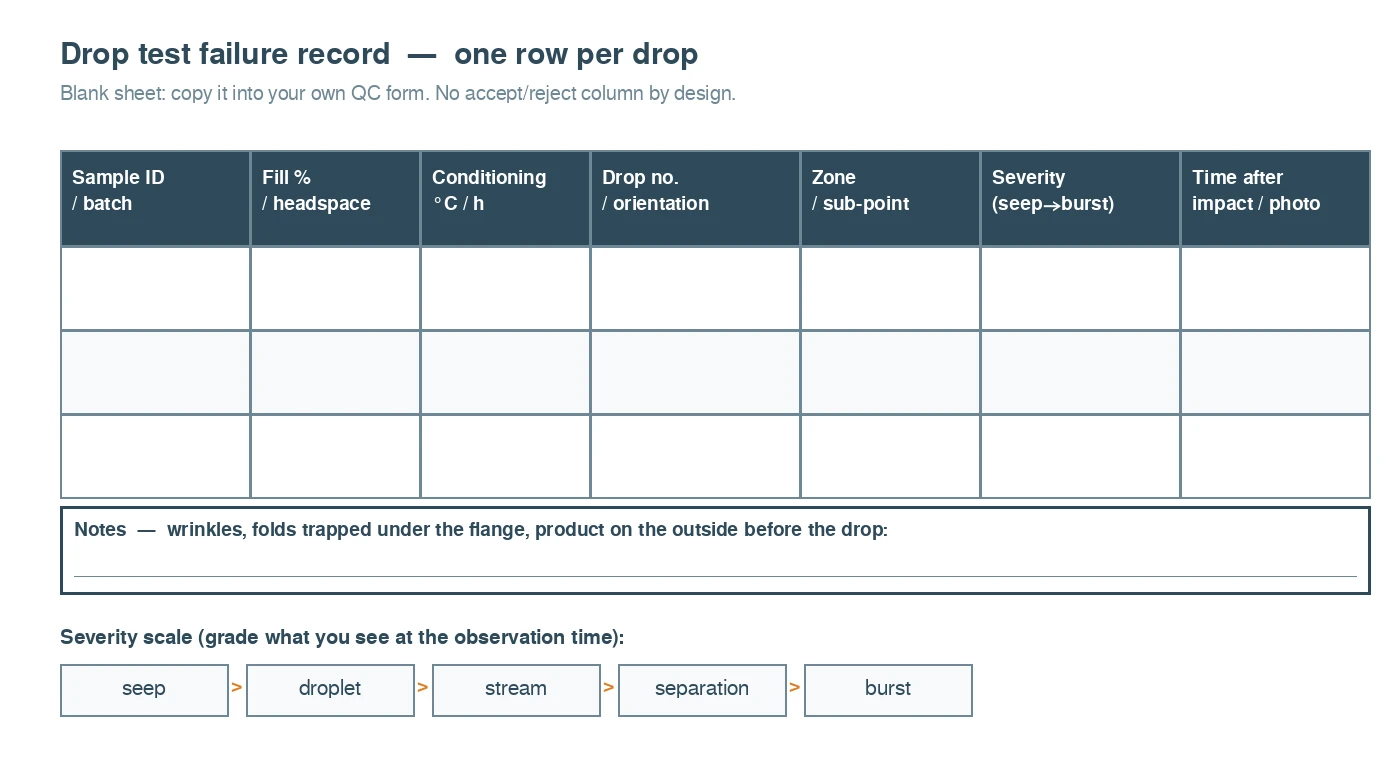
- Sample ID and batch code. Two identifiers, not one. The sample number lets you find the bag in the bin; the batch code lets you find the film, the fitment lot and the shift.
- Fill level and headspace. Record what was in the bag and how full, as a percentage of nominal capacity. Headspace is the compressible volume that decides how hard the liquid hits the weld, and it changes between a lab fill and a production fill.
- Conditioning. The temperature the samples sat at before the drop, and for how long. Film stiffness at 2 °C and at 25 °C are not the same material in a drop test, and cold conditioning is a common reason two labs disagree about the same design.
- Drop number and orientation. Sequential, from the vocabulary above. Never a summary count.
- Zone, then sub-point. The letter from the map, then where inside it — flange edge at the 6 o'clock position reads differently from flange edge at 12 o'clock.
- Severity. A fixed five-step scale, defined in words on the sheet so two testers grade the same way: seep (wet film, no droplet), droplet (slow bead forming), stream (continuous escape), separation (fitment or seal visibly open), burst. Grade what you can see at the observation time; do not upgrade a seep to a stream because you expect it to get worse.
- Observation time and photo reference. Time since impact, and a file name. A seep found at impact and a seep found after twenty minutes of standing are different severities even when the photograph looks the same.
The free-text line is for the one thing no field anticipates: a wrinkle across the seal, a fold trapped under the flange, product on the outside of the bag before the drop. Those notes are what turn a table into evidence six months later.
Two practical habits pay for themselves immediately. First, mark the zones on the pouch in marker before the drop — write A to F where they belong, small, in the margin. The photograph then carries the code, and nobody has to reconstruct which end was up. Second, photograph the sample before the drop as well as after: a wrinkle that was already there when the bag came off the line is not a drop finding, and without the before shot you cannot prove it.
What the sheet does not contain is an accept/reject column, and that is deliberate. Whether one seep in five samples is a failure is a commercial and technical decision that belongs in your specification or your buyer's, not in a blog post. Treat the recording practice as house practice rather than as an industry standard: a converter's spout pouch drop testing guide recommends recording the orientation, drop number, location and severity rather than only a pass or fail, and notes that referencing a free-fall standard such as ASTM D5276 or ISO 2248 does not by itself give you a complete test plan for every pouch application. None of the sources linked in this article is a standards body, so take the numbered tests themselves from ASTM and ISO directly.
From Zone to Cause Without Re-Diagnosing the Pouch
The zone narrows the search; it does not finish it. Use it to decide which check comes next, and let the diagnosis keep its own length.
Zone recorded | Check this next | Then read |
|---|---|---|
A — flange weld | Peel the fitment out of a failed bag: does the film tear, or does the weld release clean? | The weld-window and cause-by-cause path in diagnosing a spout leak after filling |
B — neck and threads | Torque and re-seat a leaking pack by hand, then squeeze | The same diagnosis page, closure section |
C — cap and hinge | Check band integrity and hinge cracks against a control sample that never dropped | Your closure supplier's dimensional report |
D — top seal | Look for a fishmouth or a channel; compare seal width to drawing | |
E — gusset and side seals | Measure where the split starts relative to the seal edge | Same seal article; then pack-out and carton fit |
F — film body | Magnify the puncture; check the carton for sharp edges and pouch movement | Pack-out design, not the closure spec |
One caution that saves a wrong corrective action. A zone is a location, not a cause. A flange failure that follows a bottom-corner landing is an impact-loading story even if the weld was marginal; a flange failure that follows a flat-panel landing is a welding story even if the carton was tight. Read the zone together with the drop that produced it, and only then decide which of the two you are looking at.
The same discipline applies to the fix. Packaging guidance aimed at buyers is blunt about the ordering: document the failure mode before changing film, cap or dimensions (leak testing guide for spout pouches). Changing three variables at once after a failed drop means the next test cannot tell you which change worked, and you are back to a pass/fail result with no history.
Making the Record Survive a Repeat and an Audit
A record that only you can interpret is a note. Five conditions make it something a second person — or a second year — can use.
- Same height, same orientations, same sample count between runs. Any change is a new test series and needs its own baseline row.
- Condition before every run, not just the first. Samples pulled from a warm warehouse and samples pulled from a cold container are not comparable, and the difference will be read as a design change.
- Keep the failed samples. Labelled with the sample ID, in a bag, for at least the life of the project. A photograph of a split seal is not a split seal; when the supplier disagrees, the bag settles it.
- Name the recorder and the date on every sheet. Not for blame — for the follow-up question. "Why is severity graded differently on this row" has an answer only if you know who filled it in.
- Note deviations in the free-text line, not by editing the numbers. A drop that landed on the frame instead of the floor is still a data point; it is a data point with a note.
If a leak appears after the drop rather than at it, the follow-up is a leak-location method rather than another drop — the practical options and what each one proves are set out in post-drop leak test methods for non-sterile pouches. Doing both on the same sample, in that order, is what turns a drop result into a defect description.
What a Component Supplier Can and Cannot Sign For
This is where a fitment supplier's name usually gets attached to a result it did not produce, so it is worth being precise.
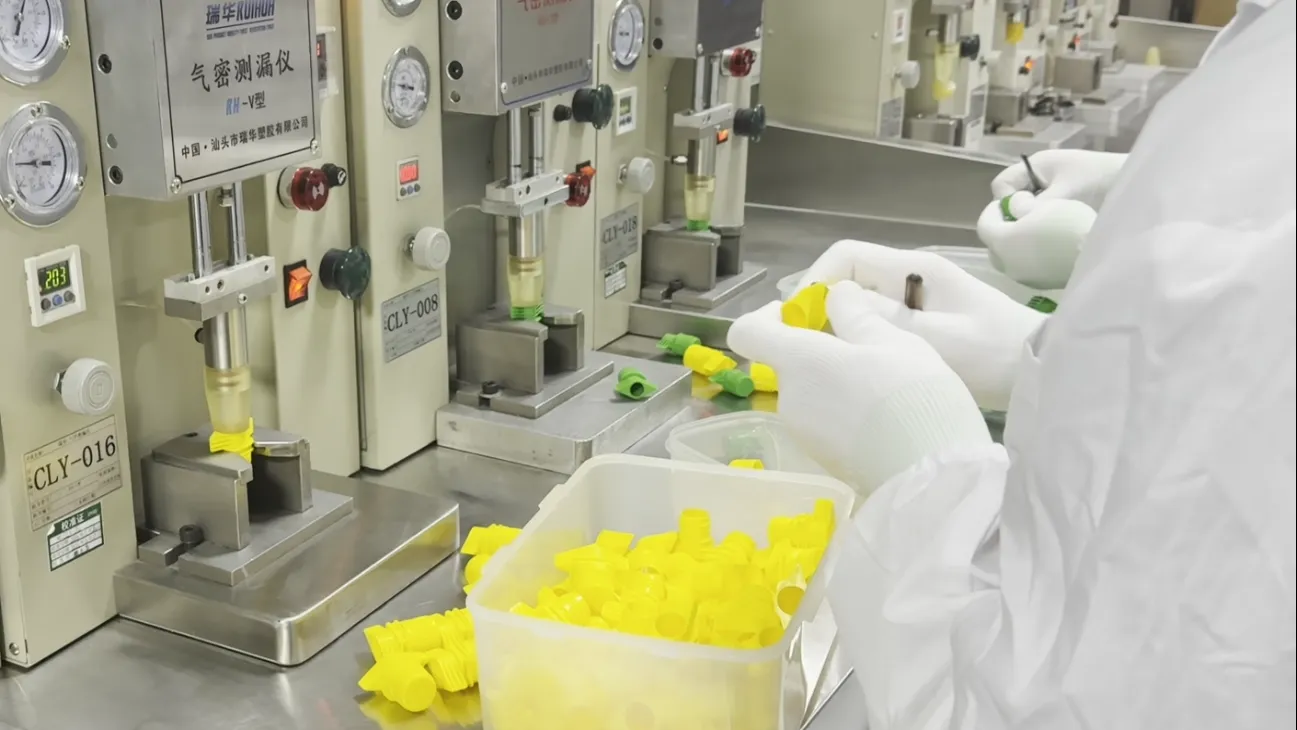
Shantou Ruihua moulds the cap and the spout — the rigid parts of the pack, from 1.2 mm to 40 mm bore, in food-grade PP and PE, with the dimensional and material records that go with them. What we can hand you for a drop test program is the component side of the ledger, and no more.
On the component side | On the system side (not ours to sign) |
|---|---|
Bore and thread dimensions, resin grade | Film structure and gauge |
Dimensional report for the cap-on-spout combination, on request | Seal width, seal window, seal pattern |
Model code and cavity marking on the part, so the failed sample can be identified | Fill temperature, fill level, headspace |
The weld window we specified, on the models where one is published | Carton, dividers, pallet pattern |
A supplier who offers to guarantee the drop performance of your finished pack is either testing a different pack or guessing. Our spout cap range for stand-up pouches is documented at that level, because the component is the part of the chain we actually control.
So put the boundary in the request rather than discovering it in a complaint. Three lines are usually enough: the fill weight and product, the carton or case configuration the pouches travel in, and the orientations your route actually produces. With those, the component data can be matched to the test instead of the test being bent to fit the component.
The Record Is the Specification's First Draft
A drop test record has a second life after the test is over. Every zone that fails twice across two runs is a line item waiting to be written into the specification: a seal width, a weld parameter, a headspace rule, a carton clearance. The zones that never fail are equally informative — they tell you where not to spend money.
That is the whole argument for recording location instead of verdict. A pass tells you the pack survived one afternoon. A zone map with dates on it tells you which part of the design is carrying the risk — and gives your next conversation with your converter and your filler something concrete to change, starting with the spout cap specification sheet you already hold.